Unlock the Secret to Silky Smoothness: How to Make White Chocolate at Home
The allure of creamy, sweet white chocolate is undeniable, whether enjoyed on its own, melted into a luscious sauce, or incorporated into a decadent dessert. While often debated by purists who argue its lack of cocoa solids disqualifies it from the "chocolate" category, white chocolate has carved out its own unique and beloved niche in the confectionery world. Its mild, buttery flavor makes it an incredibly versatile canvas for a myriad of other tastes, from vibrant citrus to warming spices and even savory herbs. But what if you could create this exquisite treat right in your own kitchen? Learning how to make white chocolate from scratch is a rewarding endeavor that grants you complete control over ingredients, flavor, and texture, elevating your homemade confections to a professional standard.
In this comprehensive guide, we'll demystify the process of crafting beautiful, smooth white chocolate from the ground up. We'll explore its fascinating history, delve into the essential ingredients and equipment, and provide detailed, actionable steps to ensure your success. Get ready to embark on a sweet journey that will transform your understanding of this delightful treat.
Understanding White Chocolate: More Than Just a Sweet Treat
To truly master the art of making white chocolate, it's helpful to understand its composition and a bit of its origin story. Unlike its dark and milk chocolate counterparts, white chocolate famously contains no cocoa solids, which are responsible for the characteristic brown color and robust chocolatey flavor. This distinction is precisely what gives white chocolate its unique appeal and a slightly controversial standing among traditionalists.
The Core Ingredients and Their Role
The foundation of white chocolate is built upon a simple yet precise combination of ingredients, each playing a crucial role in achieving its signature taste and texture:
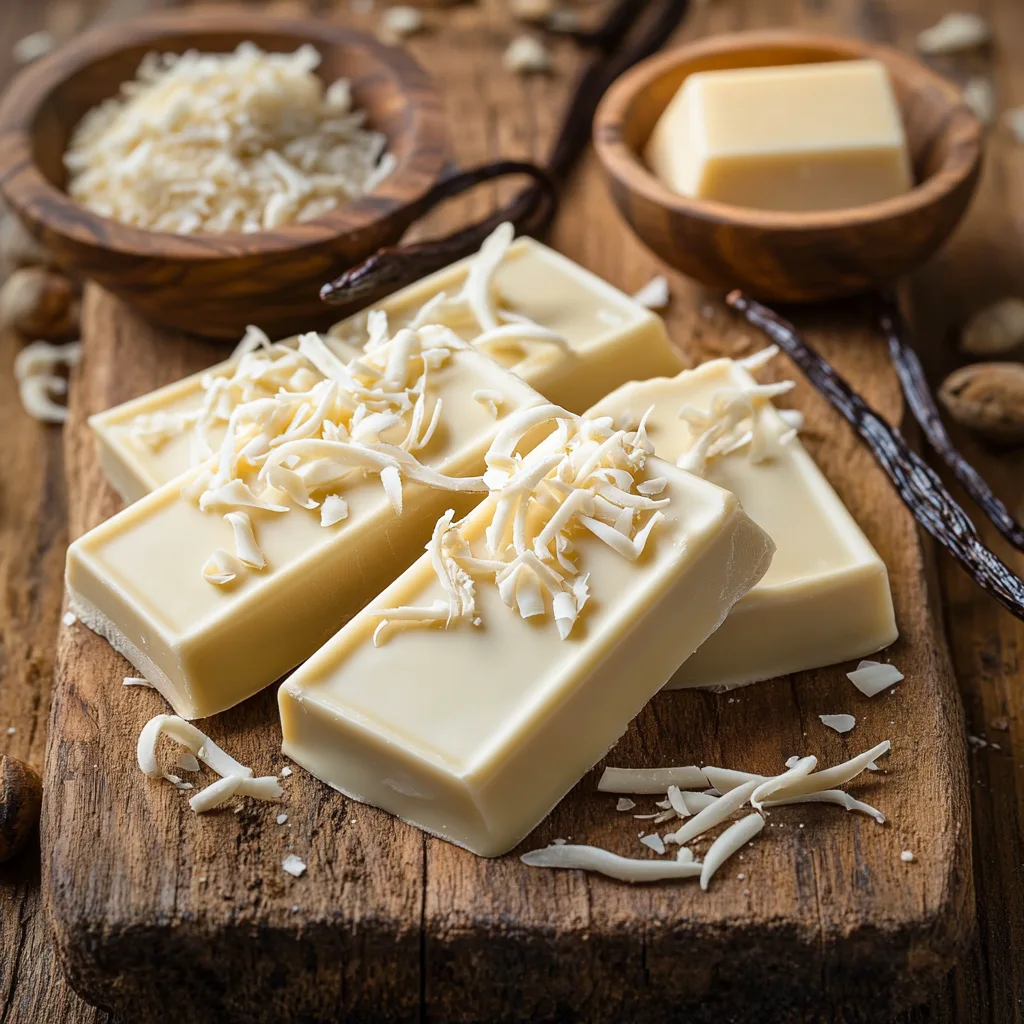
- Cocoa Butter: This is the undisputed star ingredient. A pale yellow fat extracted from the cocoa bean, cocoa butter provides white chocolate with its luxurious mouthfeel, melt-in-your-mouth quality, and inherent "chocolate" identity. Its mild flavor is what allows other ingredients to shine through.
- Milk Powder or Milk Solids: Essential for creamy texture and that distinctive milky flavor. Full-fat milk powder is typically recommended for richer results, though skim milk powder can be used for a lighter finish. For those seeking a vegan alternative, various plant-based milk powders (such as oat, rice, or even coconut milk powder) can be successfully substituted, opening up a world of possibilities.
- Sugar: The primary sweetening agent. The type of sugar used can significantly impact the final texture. Powdered (confectioners') sugar is ideal as its fine particles contribute to a smoother final product, minimizing the need for extensive grinding. If using granulated sugar, be prepared for a longer grinding process to achieve the necessary fineness.
- Vanilla: Often included for its aromatic depth, vanilla extract or vanilla bean paste adds a classic, warm note that beautifully complements the creamy base of white chocolate.
A Brief History of Innovation
While dark chocolate boasts a history spanning millennia, white chocolate is a relatively modern invention, emerging from an interesting blend of necessity and innovation. Its exact origins are a bit murky, but the prevailing story points to Switzerland in the wake of the First World War. With vast stockpiles of surplus milk powder going to waste, the ingenuity of companies like Nestlé led to its combination with sugar and cocoa butter. This inventive solution transformed a potential problem into a delightful product, with white chocolate first hitting the commercial market around 1936. There are mentions of smaller-scale productions predating this, even back to the late 19th century, but Nestlé is widely credited with its mainstream commercialization.
Essential Equipment for Crafting Homemade White Chocolate
Achieving professional-grade white chocolate at home requires more than just quality ingredients; having the right tools makes all the difference in achieving that desired silky-smooth consistency. Here’s what you’ll need:
- Digital Scales: Precision is paramount in chocolate making. Accurately weighing your ingredients ensures consistent results and optimal flavor balance.
- Heat-Resistant Spatulas: Ideal for stirring and scraping down the sides of your mixing bowl or food processor, ensuring all ingredients are thoroughly incorporated.
- Food Processor or Liquidiser: This is arguably the most critical piece of equipment for small-batch white chocolate. Its power is needed to grind the sugar crystals and milk powder into an incredibly fine consistency, blending them seamlessly with the cocoa butter. When using a food processor for dry ingredients like sugar, remember to use short pulses combined with occasional longer runs. This prevents the motor from overheating due to the lack of resistance that liquids provide. Regular scraping down of the sides is also essential. If you become serious about making chocolate, a dedicated wet grinding machine or melanger will offer superior grinding capabilities for all types of chocolate.
- Double Boiler or Saucepan with a Glass Bowl: Gentle, indirect heat is crucial for melting cocoa butter without scorching it. A double boiler system (a heat-proof bowl set over a saucepan of simmering water) provides the ideal environment. Ensure the bowl doesn't touch the water and that no steam or water comes into contact with your chocolate, as even a tiny drop can cause it to seize.
- Fine-Mesh Sieve (Optional but Recommended): Sifting your powdered sugar and milk powder before mixing helps to eliminate lumps, contributing to an even smoother texture and reducing grinding time.
Always ensure all your equipment is thoroughly clean and completely dry. Any moisture can ruin your chocolate, causing it to become grainy or seize.
Step-by-Step Guide: How to Make White Chocolate from Scratch
Now for the exciting part! Follow these detailed steps to create your own exquisite white chocolate.
Ingredient Selection for Superior Quality
The quality of your raw materials directly impacts the final product. Invest in good-quality ingredients:
- Cocoa Butter: Look for food-grade, deodorized cocoa butter, often available in pastilles or chunks. Its pale yellow color is natural.
- Milk Powder: Full-fat dairy milk powder offers the richest taste. For vegan options, experiment with powdered oat, rice, or coconut milk. Ensure your chosen alternative milk powder is finely ground.
- Sugar: Confectioners' sugar (powdered sugar) is highly recommended for its fine texture. If you only have granulated sugar, be prepared for more extensive grinding to achieve a smooth consistency.
- Vanilla: Use a high-quality vanilla extract or paste for the best flavor.
The Process: From Raw Ingredients to Silky Smoothness
- Melt the Initial Cocoa Butter: Begin by gently melting about two-thirds of your measured cocoa butter in your double boiler. Heat it until it's fully liquid and clear, then remove it from the heat.
- Grind Dry Ingredients: If using granulated sugar, begin by grinding it in your food processor until it reaches a very fine, powdery consistency, akin to confectioners' sugar. Then, add your powdered milk (or alternative milk powder) and blend briefly to combine. Pour about half of your melted cocoa butter into the food processor with the dry ingredients. Pulse and process, scraping down the sides frequently with a spatula. The mixture will initially look like a coarse paste, then gradually become smoother and more liquid as the tiny sugar crystals and milk fat globules are reduced and suspended within the cocoa butter. This stage is crucial for eliminating any grittiness.
- Incorporate Remaining Ingredients: Once the initial mixture in the food processor is noticeably smooth, add the remaining melted cocoa butter. Continue processing. The goal is to achieve a uniform, silky-smooth suspension where thousands of minute sugar crystals blend perfectly with the tiny fat globules of milk powder and cocoa butter. This can take a significant amount of time (10-20 minutes or more in a home food processor), so be patient and continue to scrape down the sides. The mixture should feel warm from the friction of grinding.
- Flavoring (Optional but Recommended): Once your white chocolate base is completely smooth, remove it from the food processor. Stir in your vanilla extract or paste. This is also the stage to get creative with other flavorings! Consider adding a touch of citrus zest, a pinch of cardamom, some fruit powder (like raspberry), or even a few drops of food-grade essential oils (peppermint, orange). The mild flavor of white chocolate makes it an ideal canvas for augmenting other flavors such as nuts, dried fruit, turmeric and even herbs like rosemary and dill.
- Tempering (For Professional Finish): For white chocolate with a glossy shine, a crisp snap, and resistance to blooming (white streaks appearing on the surface), tempering is essential. This involves carefully heating and cooling the chocolate to specific temperatures to stabilize the cocoa butter crystals. While a detailed tempering guide is beyond the scope of this article (you can find more advanced techniques in how to make white chocolate - Article 2), know that it's the next step for a truly professional result. If skipping tempering, your chocolate will still taste delicious but may have a softer texture and a duller appearance.
- Molding and Setting: Pour your tempered (or untempered) white chocolate into clean, dry molds. Tap the molds gently on your counter to release any trapped air bubbles. Place the molds in the refrigerator for about 30-60 minutes, or until fully set. Once firm, carefully unmold your beautiful homemade white chocolate.
Unleashing Creativity: Flavor Variations and Uses
The beauty of making your own white chocolate lies in its incredible versatility. As a mild-flavored base, it eagerly embraces a spectrum of additional flavors and can be used in countless culinary creations.
Inspiring Flavor Combinations
Think of your homemade white chocolate as a blank slate. Here are some ideas to spark your imagination:
- Fruity & Zesty: Incorporate finely grated lemon, orange, or lime zest. For a vibrant color and tangy taste, mix in freeze-dried raspberry or strawberry powder.
- Spiced & Warming: Add a pinch of cinnamon, cardamom, ginger, or even a hint of turmeric for a golden hue and earthy warmth.
- Herbal & Unique: For adventurous palates, a tiny amount of finely chopped fresh rosemary, lavender buds, or mint can create surprisingly sophisticated flavor profiles.
- Nutty & Textured: Fold in finely chopped toasted nuts like pistachios, almonds, or macadamia nuts for crunch and depth.
- Gourmet Additions: Consider espresso powder for a mocha twist, a dash of high-quality matcha for an earthy note, or even a few flakes of sea salt to enhance sweetness.
Beyond the Bar: Culinary Applications
Your homemade white chocolate isn't just for eating in bar form. It can be transformed into an array of delightful treats:
- Decadent Desserts: Use it in truffles, rich cheesecakes, light mousses, or velvety ganaches. It's also fantastic for drizzling over fresh fruit or stirring into hot cocoa bombs for a creamy indulgence.
- Baking: Chop it into chunks for cookies, brownies, or muffins. Melt it down to create a luxurious coating for cake pops, petit fours, or enrobed strawberries.
- Fillings & Frostings: Whip it into buttercream for a unique frosting, or use it as a base for creamy tart fillings.
Store your finished white chocolate in an airtight container in a cool, dark place (ideally between 60-70°F or 15-21°C) to maintain its quality and prevent melting or blooming.
Conclusion
Crafting white chocolate from scratch is a deeply satisfying culinary adventure. From understanding its unique composition and surprising history to meticulously grinding ingredients and exploring endless flavor possibilities, you've gained the knowledge to create a truly exceptional product. The process, while requiring patience and attention to detail, yields a reward far greater than any store-bought equivalent: a white chocolate that is perfectly tailored to your taste, free from unwanted additives, and imbued with the pride of homemade excellence. So gather your ingredients, fire up your food processor, and delight in the sweet magic of making your own white chocolate. For more advanced techniques and troubleshooting, don't forget to explore resources like how to make white chocolate - Article 2.
