Unlock the Secrets: How to Make White Chocolate from Scratch
The allure of rich, creamy white chocolate is undeniable. Whether you're a seasoned home chef or a curious beginner, the prospect of crafting your own velvety white chocolate from scratch is both exciting and rewarding. Far more than just a sweet treat, homemade white chocolate offers unparalleled purity of flavor and a customizable canvas for your culinary creations. If you've ever wondered
how to make white chocolate that rivals professional quality, you've come to the right place. This comprehensive guide will walk you through the process, from selecting the finest ingredients to the detailed steps of bringing it all together, ensuring you achieve a truly indulgent result.
The Unique History and "Chocolate" Debate of White Chocolate
White chocolate holds a fascinating, albeit somewhat debated, place in the confectionery world. Unlike its dark and milk chocolate counterparts, white chocolate does not contain cocoa solids – the ingredient responsible for the characteristic brown color and intense chocolate flavor. This distinction has led to an ongoing discussion among purists about whether it truly deserves the "chocolate" moniker.
The origins of white chocolate are relatively recent, emerging in the early 20th century. While its exact invention story is shrouded in a little mystery, the most widely accepted narrative points to a stroke of ingenuity by the Swiss company Nestlé. Following the devastation of the First World War, there was a significant surplus of milk powder, an ingredient that had been vital for wartime provisions. Facing the challenge of unused stockpiles, Nestlé ingeniously combined this milk powder with sugar and, crucially, cocoa butter – the pale yellow fat extracted from the cocoa bean. This innovative blend gave birth to white chocolate, which first appeared on the commercial market around 1936. This story beautifully illustrates the concept that "necessity is the mother of invention," transforming a potential waste product into a beloved confection enjoyed worldwide.
Despite the ongoing debate surrounding its classification, white chocolate's mild, sweet, and creamy profile is precisely what makes it so valuable in culinary applications. Its delicate flavor acts as an ideal backdrop, allowing other ingredients to shine through without being overpowered. This makes it an incredibly versatile base for a myriad of augmentations, from vibrant citrus and fragrant spices to earthy nuts and even unexpected herbs like rosemary or dill.
Essential Ingredients for Crafting Homemade White Chocolate
Mastering
how to make white chocolate begins with understanding and selecting the right ingredients. The magic happens when a few simple components are combined with precision and care.
The Core Trio: Cocoa Butter, Sugar, and Milk Powder
At its heart, white chocolate is built upon three primary ingredients, each playing a critical role in its final texture and flavor:
*
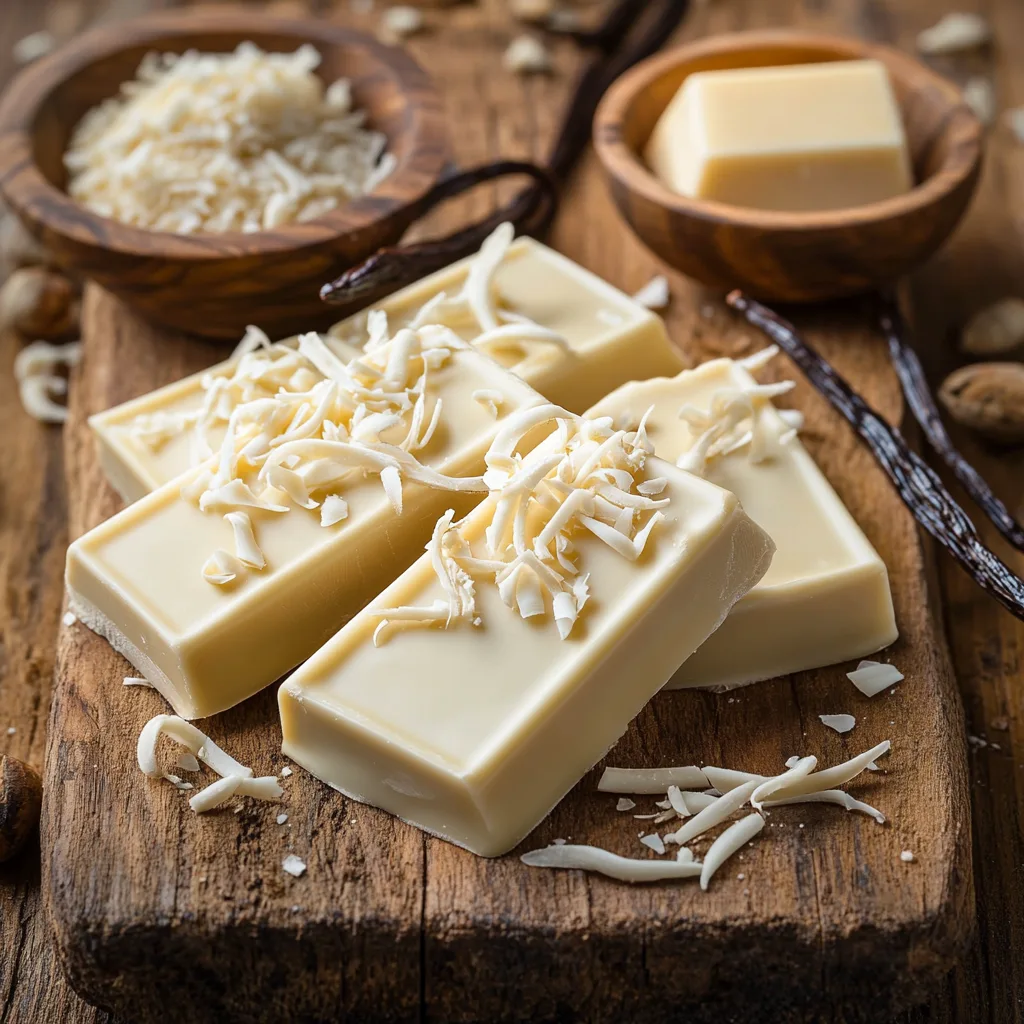
Cocoa Butter: This is the foundational ingredient. Cocoa butter is the natural fat extracted from the cocoa bean, and it's what gives white chocolate its characteristic melt-in-your-mouth texture and creamy richness. For superior results, always opt for high-quality, food-grade cocoa butter. It comes in various forms, often as wafers or larger chunks, and should smell faintly like chocolate, though much milder. Its pale yellow hue contributes to the overall "white" appearance of the finished product.
*
Sugar: Sugar provides the sweetness and helps in creating the silky texture. While granulated sugar can be used, it requires extensive grinding. For the smoothest possible white chocolate,
powdered sugar (confectioners' sugar) is highly recommended as it's already finely milled, significantly reducing the processing time and wear on your equipment. If you must use granulated sugar, be prepared for a longer grinding process, focusing on achieving an incredibly fine, dust-like consistency.
*
Milk Powder/Solids: This ingredient is essential for imparting the creamy, dairy notes that define white chocolate. Full-fat milk powder is often preferred for its richer flavor and contribution to a smooth texture, but skim milk powder can also be used. The milk solids, along with the fat from the cocoa butter, form the luxurious suspension that characterizes well-made white chocolate.
Flavor Enhancers and Vegan Alternatives
Beyond the core trio, you have the opportunity to personalize your white chocolate:
*
Vanilla Extract/Beans: A touch of vanilla is a classic addition that enhances the overall flavor profile, adding warmth and depth without overpowering the delicate cocoa butter notes. High-quality vanilla extract or even scraping seeds from a vanilla bean will elevate your homemade white chocolate.
*
Other Flavorings: This is where your creativity can truly shine. Because of its mild base, white chocolate is an exceptional "canvas." Consider incorporating citrus zest (lemon, orange), finely ground spices (cardamom, cinnamon), fruit powders (raspberry, strawberry), or even a few drops of food-grade essential oils (peppermint, lavender). Just remember to add these sparingly and taste as you go.
*
Vegan Option: For those seeking a plant-based alternative, making vegan white chocolate is entirely possible! Simply substitute the dairy milk powder with a high-quality vegan milk powder, such as oat milk powder, coconut milk powder, or rice milk powder. Ensure your chosen vegan milk powder is finely milled and has a pleasant flavor profile that complements your desired outcome.
Step-by-Step Guide: How to Make White Chocolate at Home
With your quality ingredients at hand, let's dive into the practical steps for creating your own delicious batch of white chocolate.
Gathering Your Equipment
Before you begin, ensure you have the following kitchen tools ready:
*
Accurate Digital Scales: Precision is key in chocolate making. Weighing ingredients ensures consistent results.
*
Heatproof Spatulas: For stirring and scraping down the sides of bowls.
*
Food Processor or Liquidizer: A good quality food processor with strong blades is crucial for grinding the sugar and achieving the smooth consistency required. While a basic home model works for small batches, be mindful of its motor.
*
Double Boiler or Saucepan and Glass Bowl: For gently melting the cocoa butter without scorching. A heatproof glass bowl placed over a saucepan of simmering water (ensuring the bowl doesn't touch the water) creates an effective double boiler.
The Melting and Grinding Process
This is the core of
how to make white chocolate, focusing on transforming your raw ingredients into a smooth, cohesive mass.
1.
Prepare and Melt the Cocoa Butter: Carefully weigh out your cocoa butter. Place it in the top of your double boiler or in a heatproof bowl set over simmering water. Allow it to melt gently and completely. Once melted, remove it from the heat but keep it warm.
2.
Grind the Sugar (if necessary): If you're using granulated sugar, this step is vital. Place the granulated sugar in your food processor. Pulse in short bursts, allowing the motor to rest frequently. The goal is to grind the sugar crystals into an incredibly fine, flour-like powder. Granulated sugar is hard, and continuous running can quickly overheat and damage your food processor's motor. Continue until no grittiness remains when you rub a tiny pinch between your fingers. If using powdered sugar, you can largely skip this intensive grinding, though a quick pulse to ensure uniformity doesn't hurt.
3.
Combine Cocoa Butter and Sugar: Pour the warm, melted cocoa butter into your food processor along with the finely ground sugar (or powdered sugar). Process this mixture. At first, it might seem crumbly, but with continued processing, the cocoa butter will begin to dissolve the sugar, forming a thick paste. Keep processing, occasionally scraping down the sides with a spatula, until the mixture appears very smooth and no longer gritty. This might take 5-10 minutes, depending on your machine and sugar.
4.
Incorporate Milk Powder: Once the cocoa butter and sugar mixture is sufficiently smooth, add your weighed milk powder (or vegan alternative). Continue processing. This is where the magic really happens. The thousands of minute sugar crystals, combined with the tiny fat globules of milk powder and cocoa butter, will begin to emulsify and blend. The mixture will transform from a paste into a "silky-smooth suspension." It's essential to continue grinding until the texture is utterly uniform and velvety. This crucial step reduces the particle size of all ingredients to a point where they are imperceptible on the tongue, creating that desirable melt-in-your-mouth quality.
Flavoring, Tempering, and Molding
Once your white chocolate has reached its optimum smoothness, you're ready for the finishing touches.
1.
Add Flavorings: Stir in your vanilla extract or any other desired flavorings (citrus zest, spices, etc.). Mix thoroughly until evenly distributed.
2.
Temper the White Chocolate: For a professional finish – shiny appearance, crisp snap, and resistance to blooming (gray streaks) – your white chocolate needs to be tempered. This involves carefully heating and cooling the chocolate to specific temperatures to stabilize the cocoa butter crystals. Tempering is an art in itself and is a crucial advanced step for making beautiful chocolate bars and confections. For a more detailed guide on this process, refer to
how to make white chocolate - Article 3.
3.
Mold Your Creations: Once tempered, pour your white chocolate into molds of your choice – bar molds, individual candy molds, or even simply spreading it thinly on parchment paper to create shards. Allow it to set completely at room temperature or in the refrigerator for faster setting.
Tips for Success and Creative Uses
Crafting homemade white chocolate is a journey of precision and patience. Here are some final tips and ideas for enjoying your delicious creation.
Troubleshooting & Refinements
*
Ingredient Quality Matters: Invest in the best quality cocoa butter you can find. It makes a significant difference in the final taste and texture.
*
Patience with Grinding: Do not rush the grinding process in the food processor. Particle size reduction is key to smoothness. If you find yourself enjoying making white chocolate frequently, a specialized wet grinding machine or melanger can take your homemade chocolate to an even higher level, offering superior smoothness and efficiency.
*
Avoid Water: Ensure no water comes into contact with your cocoa butter or chocolate mixture, as even a tiny drop can cause it to seize and become grainy.
*
Vegan Texture: When making vegan white chocolate, the choice of vegan milk powder can impact the final texture. Some powders are naturally more absorbent than others, potentially requiring slight adjustments to the cocoa butter quantity to achieve the desired consistency.
Storing Your Homemade White Chocolate
Once set, store your homemade white chocolate in an airtight container in a cool, dark place, ideally between 60-70°F (15-21°C). Properly stored, it can last for several months, though its deliciousness might mean it doesn't last that long!
Culinary Applications
Your homemade white chocolate is incredibly versatile. Use it to:
* Make luxurious truffles or ganaches.
* Elevate cheesecakes, mousses, or tarts.
* Create stunning white chocolate bars with added fruits, nuts, or spices.
* Fold into cookies or brownies for an extra layer of richness.
* Craft beautiful decorations for cakes and desserts.
* Whip up decadent hot cocoa bombs.
* Use as a base for flavor infusions, such as a lemon-infused white chocolate sauce or a matcha-white chocolate coating for pretzels.
For more inspiration and a deeper dive into the world of homemade chocolate, you might find
how to make white chocolate - Article 1 a valuable resource.
Conclusion
Making white chocolate from scratch is an incredibly rewarding culinary adventure. It offers a unique opportunity to control the quality of your ingredients, experiment with flavors, and achieve a level of freshness and purity simply not found in most store-bought varieties. By understanding the roles of cocoa butter, sugar, and milk powder, and by carefully following the steps for melting and grinding, you can create a truly professional-grade white chocolate right in your own kitchen. Embrace the process, savor the rich aromas, and delight in the silky-smooth texture of your homemade masterpiece. The versatility of this confection ensures that your efforts will be well-rewarded, providing a delightful base for countless delicious creations.